Let’s Design a VCarve Sign – Sign Designing Tips Part 1
Custom signs can be put up anywhere – in your living room, by your door, right outside your office, and the list goes on. Wherever it is, signs add aesthetic value to all sorts of spaces and the right custom sign can sell like hotcakes on Facebook Marketplace and Etsy!
So in this tutorial, we are going to be designing a VCarve sign using the different tools available on Vectric Aspire. Best for beginners and intermediate-level carvers, this design is also compatible with both Vectric VCarve Desktop and Vcarve Pro design software.
Follow through the entire process with Laney Shaughnessey on SpindleTV and don’t forget to hit the SUBSCRIBE button to keep up with our bi-weekly LIVE Vectric classes!
Special Calculation Characters

Before we start, let us introduce you to special calculation characters. Special calculation characters are shortcuts that you can use in equation boxes. To give you an idea, the letter ‘w’ is a special calculation character for width.
These characters help in conversion and make it easier for you to input the right value without having to type it in manually. For instance, if you want to set your point at the center of your profile, you can type down “w/2=” and it will automatically substitute ‘w’ with your exact width measurement and divide it by 2.
To find a complete list of these symbols, you can click Help Contents under the Help tab, then select the Calculate Edit Boxes under the Interface menu.
Now that you have a reference list you can use for your calculations, we can start designing our VCarve sign!
1.Creating a Round-Edged Border

Like any other projects, let’s start by completing the Job Setup.
For our sign, we’ll be working on a 16x11-inch, single-sided project, that’s 3 ¼ inches thick. The Z Zero Position will be set on the Material Surface, and the XY Datum starts at the bottom left corner.
The base of this sign will be a round-cornered rectangle, so we’ll be using the Draw Rectangle tool and tick the Radiused External box. Then, set it to your preferred Radius (which for us is 3 inches).
As for the size, we want the rectangle to be an inch away from the boundaries, so we’ll subtract 1 from the width and height of the entire project to get the exact size.
Lastly for the base, we’ll create a ½ inch border using the Offset Inwards tool.
2.Tracing an Image

Now, let’s learn how to trace some images.
Import your image and click on Trace Bitmap Tool. Turn off Bitmap fading and drag the Threshold to a 0.75 and click Apply. Then, turn off the Bitmap layer and you should be left with a traced vector of your image.
If your image is low quality and is leaving bumpy curves, you can increase the Noise Filter to smooth out these lines. But if not, then it’s best to keep it at 1 Pixel.

Pro Tip: Only trace images ONCE.
As soon as you have a traced vector, create a new 6x6-inch project and paste the vector. Center it onto the board, and save it on your Custom Images folder. Your Custom Images folder should be created inside the Clipart folder which you can find when you follow this path:
Local Disc (C:) > Users > Public > Public Documents > Vectric Files > Clipart > Custom Images
This way, you can easily find your traced images in your software’s Clipart tab. For your convenience, you can also create a desktop shortcut for this folder so you won’t have to travel so far when saving a new traced image.
3. Adding, Editing, and Aligning New Vectors
This sign will have four main components – the eagle, the shield, the banner, and the stars. Since we already have a traced image of the eagle, you can easily import and set it at the center of your project.
Creating the Custom Patriotic Shield
For the shield, we’ll create it from scratch using Shield 5 under 2D Vectors in the Clipart Tab.

Using Node Editing, we’ll drag the points and create arcs on the right side to create the shape we want our shield to have. Then, we’ll cut the vector in the middle, delete the left side, and create a mirrored copy to the left. Then, we’ll use the Join Vectors Tool to group the vectors together, and we will have a new shield shape.

Then, we’ll also use the Draw Rectangle tool to add the shield design. We’ll also add a line at the center which we can use to mirror certain vectors.
For example, if we want to mirror a rectangle so that it’s perfectly symmetrical on the other side, we’ll just select the rectangle and the center line, go to the Mirror tool and click Flip About Line.
Then, we’ll offset the shield outward to add a border and trim the extra vectors using the Interactive Trim Tool. As a final touch, we’ll add three stars at the top of our shield, with the center star a bit bigger than the rest.
Group it as one item, and the final shield will look like this:

Adding One Vector on Top of the Other
Now for this design, we want to create the illusion that the eagle is in front of the shield and the banner is in front of the eagle.

To create this illusion, the first step is to drag each vector to its rightful position. Then, we need to ungroup the eagle and create two extra outlines around the eagle so that it carves correctly. To do this, we have to offset it outwards by 1/16 inch twice.

Select the shield and the outermost boundary of the eagle you just created, and Clear Inside Boundary using the Trim tool. Then, delete the outermost boundary and regroup the eagle.
Adding and Aligning Star Background
For the background, we want to add a few stars around. Duplicate the star on the shield and create three copies of the star on the left side of your project.

To align them perfectly, select the three stars, hold the Shift key and select the inner boundary of your rectangle. Then, under Alignment tools tick the Inside Last Vector box under Space Selection, space it vertically, and click on the left to right Align to Selection.

If you want to edit the placement of your stars, you can just select one and bump it to whichever direction you want using the arrow keys on your keyboard. When finished, reselect the three stars, go to the Mirror tool, tick Flip About Job Center, and Flip Horizontally.
Following the earlier process of moving a vector in front of the other, the final design with the banner should look like this.


Want to start a CNC wood carving business from home?
Download our 18-page guide packed with tips and advice from successful customers who have already made it happen.
Take the first step towards turning your passion into a profitable business!
4.Adding Texts

Let’s add some texts!
For this design, we’ll type in “America” at the top part, and use the Alignment tool to center it onto the material. We’ll also use the Edit Text Spacing and Curve tool to add a bit of an arc to our text.
Feel free to play around with the typeface and font styles!
5.Calculate the Toolpaths

When you’re finished with your design, then we can proceed to calculating the toolpath.
Open Toolpaths and make sure all of the details are correctly typed in. Start Depth should be at zero, Flat depth at ⅛ inch, End Mill at ⅛ inch, and Raster Cut. Then, select the entire design except for the outermost border and Calculate.
You’ll have another toolpath just for the outermost border since this will cut off the entire edges and leave the round-cornered base.
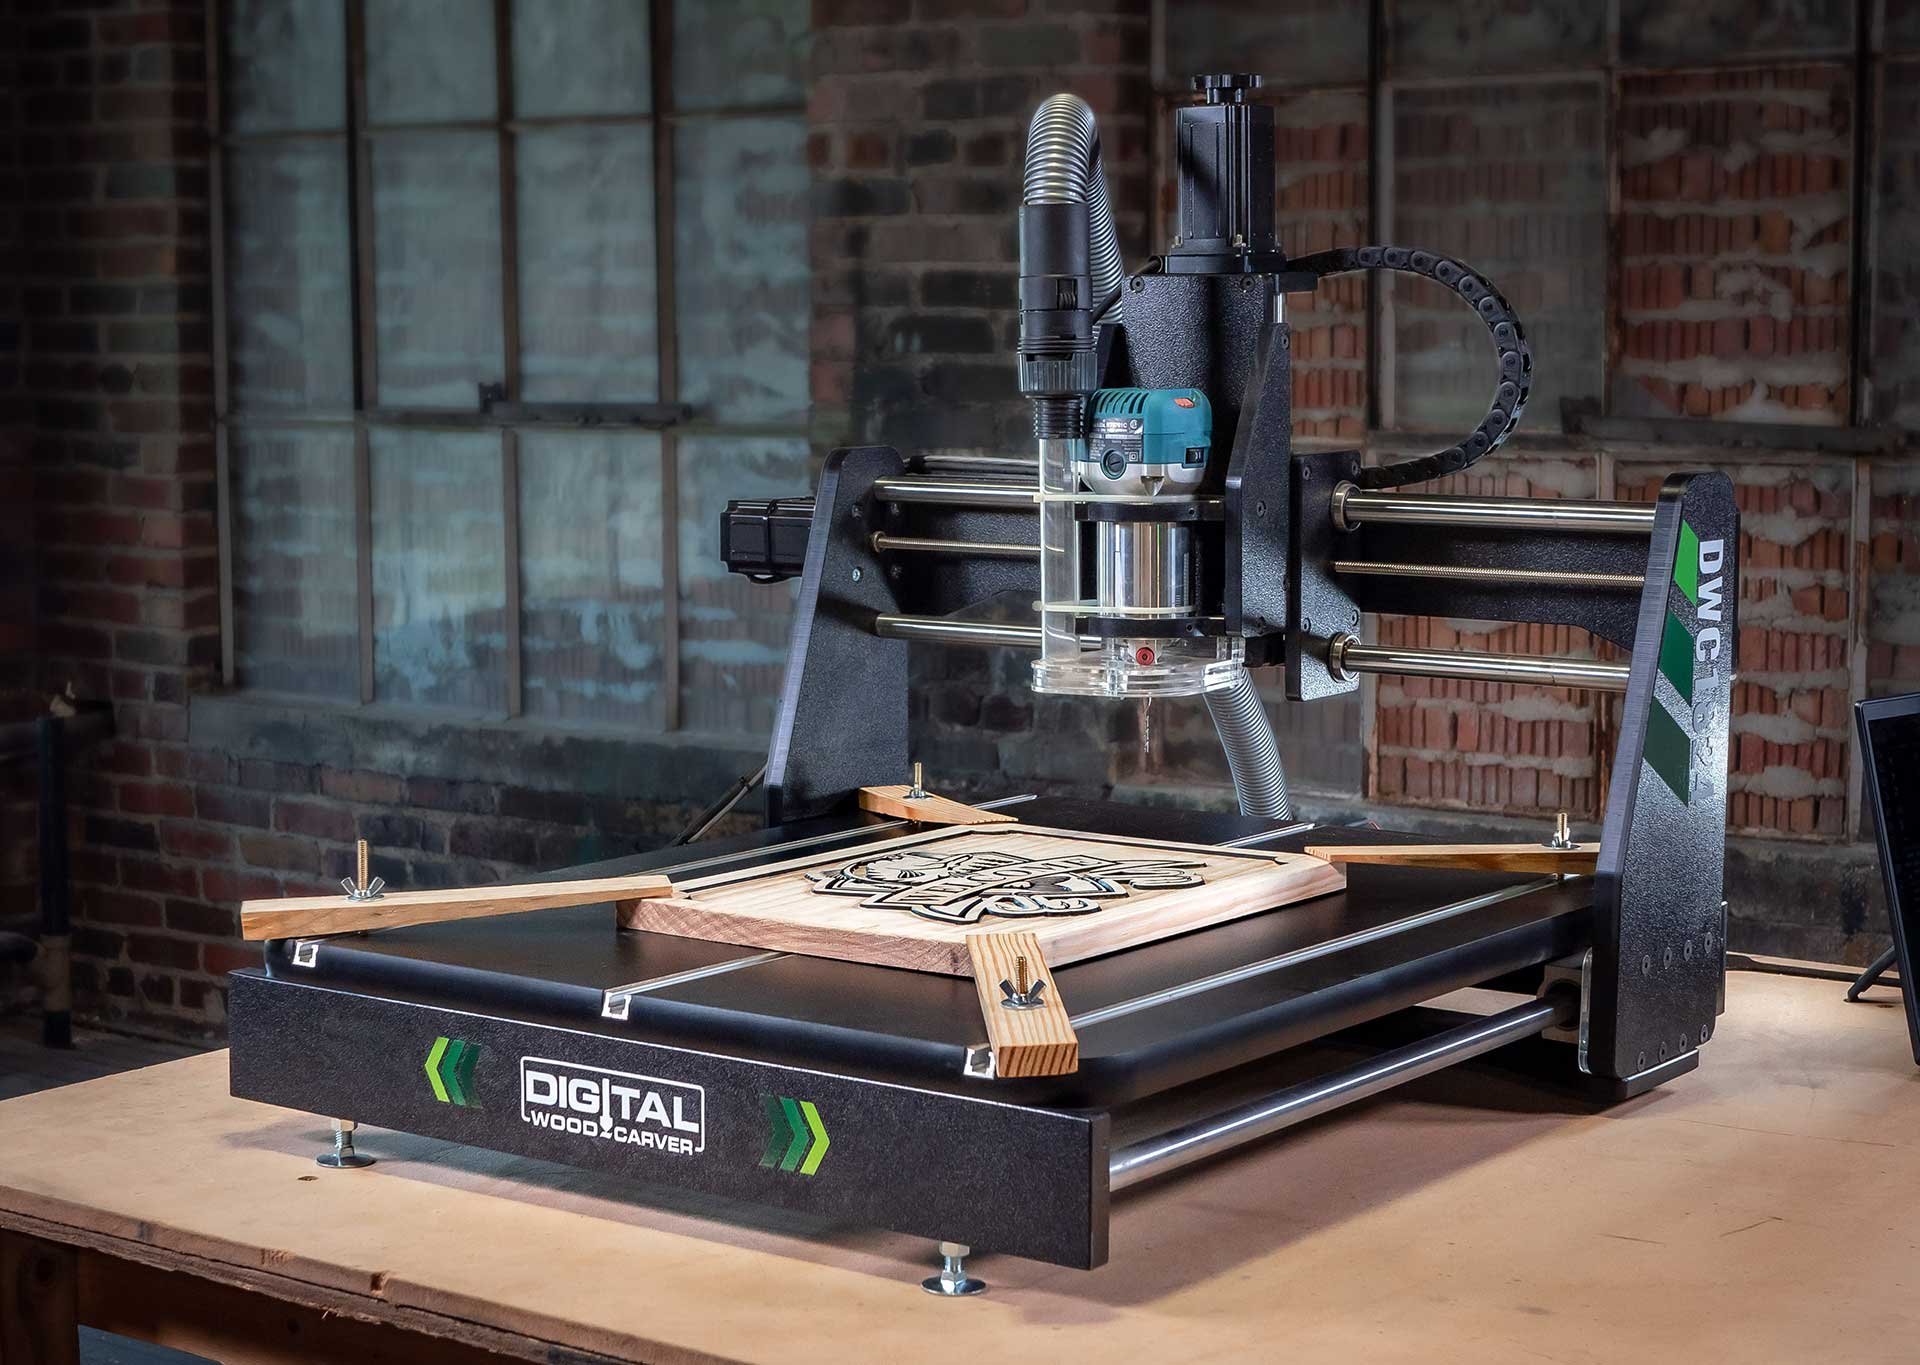
Preview the Toolpaths and if you’re satisfied, get your CNC machine running!
Connect with Digital Wood Carver
When you’re finished with your design, then we can proceed to calculating the toolpath.
Open Toolpaths and make sure all of the details are correctly typed in. Start Depth should be at zero, Flat depth at ⅛ inch, End Mill at ⅛ inch, and Raster Cut. Then, select the entire design except for the outermost border and Calculate.
You’ll have another toolpath just for the outermost border since this will cut off the entire edges and leave the round-cornered base.
Preview the Toolpaths and if you’re satisfied, get your CNC machine running!
–
To follow through the entire step-by-step process, watch the first part of Laney’s Lets Design a VCarve Sign Tutorial on SpindleTV! Don’t forget to like and Subscribe to the SpindleTV channel to keep up with the latest updates and to join our LIVE Vectric classes every other week.